I'm happy to be reviving the blog to share some pictures of the ferrocement tank we just finished with a little community perched on a steep hill overlooking the Laguna de Chiriqui on Panama's Caribbean coast. My old Peace Corps buddy Eta still lives out there and is helping this tight-knit group organize and implement a community project to pipe potable water to their homes for the first time.
The new tank will store rainwater captured from the zinc roof of this recently completed community rancho and the water will be piped down to the dozen houses perched along the hillsides below. Every morning, men, women and children from those homes turned up to join in a lively and enthusiastic work force. A huge advantage of ferrocement tanks in this remote area is that while being very labor intensive, a tank can be built with just a fraction of the imported materials cost of the reinforced concrete or cement block tanks that have traditionally been built in rural water projects in Panama.
.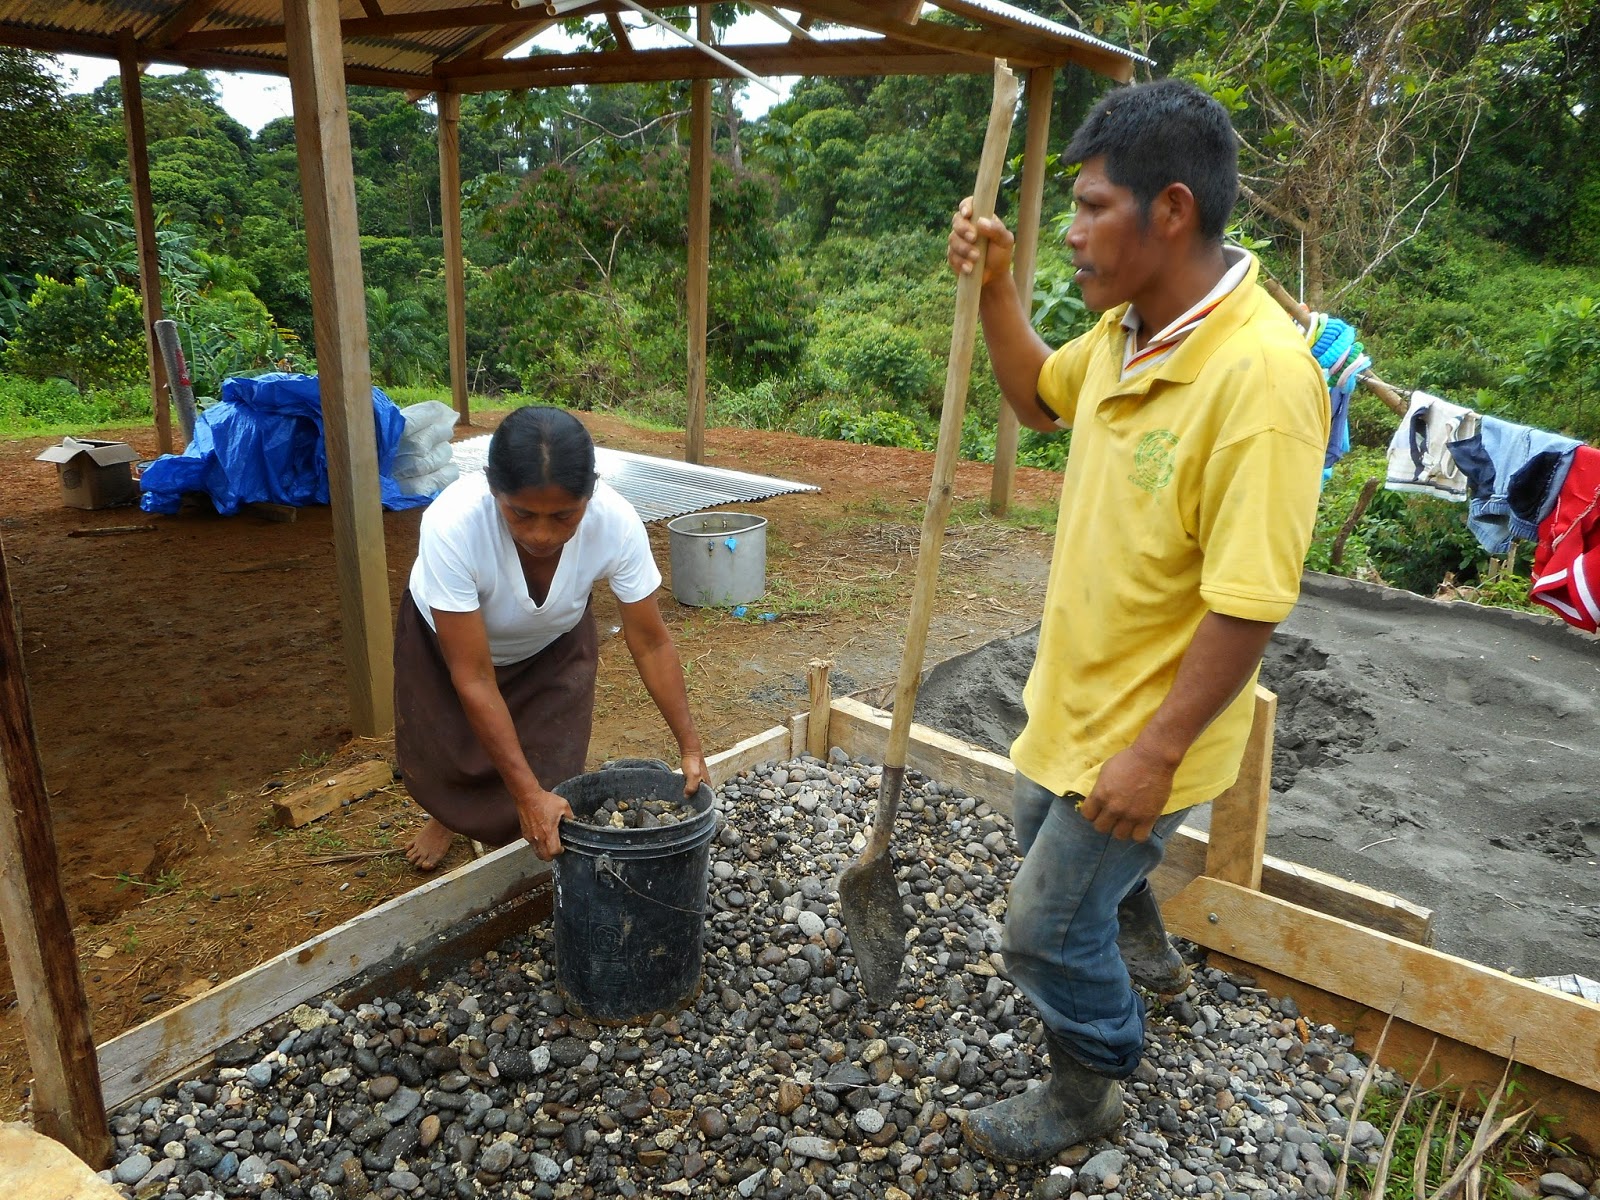
A tremendous amount of work had been done at the outset to gather sand and rock for the project from the coastline below and haul it up in bulging chakaras along a steep and muddy path to the job site.
The rock used in the foundation slab was taken from the sea floor and wasn't exactly the well-graded aggregate used in the industrialized world, but it works. The abundant July rains had effectively rinsed most of the salt away, and we compensated for the less than ideal quality beach sand by enriching the mix for all of the plastering to a 1:2 cement to sand ratio.
The tank was made by plastering over an internal form made of six foot long zinc roofing sheets fastened side to side to create a cylinder. The cylinder is placed on the circular concrete foundation.
Lengths of barbed wire and a sheet of chicken wire had been stretched across the foundation, forming the reinforcement for the floor that would be poured later. The rolled up ends of the barbed wire would be stretched vertically up onto the wall after the first coat of plaster had hardened.
The cylinder was very wobbly, but once in place, we bent quarter inch rebar hoops to size on a ring of stakes.
The hoops were slipped over the form and tied on with wire, one at the bottom and two near the top. That stiffened the form up considerably and we wrapped it all with overlapping layers of chicken wire and steadied the form further with guy wires of string before a first coat of plaster was packed firmly onto the form and covering the mesh.
The next day, the eighteen strands of barbed wire sticking out from under the plastered form like spokes of a wheel were unrolled and stretched vertically against the tank wall. Then the whole tank was wrapped tightly from bottom to top with a spiral of barbed wire that will provide the strength to resist the hoop stresses of the 1,500 gallons of water the tank will hold.
Short lengths of quarter inch rebar
for framing the roof were lashed onto the top edge of the tank with the barbed wire.
Two more coats of plaster were applied to cover all of the wire and bring the bring the exterior wall to its full thickness.
With the outside wall finished, we wet the tank down, wrapped it in plastic sheeting and took a day off. We'd worked four days straight and everyone needed a day to get food for their families anyway, which meant going out fishing, or hiking or paddling to their fincas to harvest crops like dasheen, banana, yuca and the delicious and currently abundant pixvae.
The indigenous people that live here are subsistence farmers and fisherman and we enjoyed the bounty of the sea and their forest
fincas by the heaping plateful when workday lunches were served.
With plenty of laborers pitching in the work days weren't usually all that long and it was a daily delight to walk back down the trail to Eta's house after work, crossing the little quebrada where this grandma might be fishing, and wade fully clothed into the warm sea to begin washing the mud and cement off our work clothes and ourselves.
Cooled off, refreshed and processing the day's work, we would talk over what we'd learned and brainstorm details of the next steps. And we'd stop for moments of sheer joy at how sublime it all was.
Invariably, the reverie would be broken before long by the arrival of the kids looking to have some rowdy fun which Eta never seemed to be too tired to provide.
Back at the tank we pulled the zinc sheets away from the wall and lifted them out of the tank before applying a coat of plaster to the inside of the walls and pouring the floor, pulling the mesh and barbed wire up into the floor plaster as we went.
Four more concentric hoops of quarter inch bar were tied to the vertical bars to create a stiff domed roof framework with a manhole opening in the center.
We tied
panels of hardware cloth and more chicken wire to the framework and applied the first of two coats of plaster to the outside of the roof.
Climbing down into the tank to plaster the underside of the roof was always going to be a big job suitable for a small worker, so it was great that Eta's apprentice, Keri, had become so adept with a trowel.
The next day a waterproofing coat of water, cement and Sika was heavily brushed into the inside wall, ceiling and floor.
Finally, we suspended a simple formwork to cast the manhole cover in place, a technique that makes it possible to custom fit a snug fitting lid to the irregular, hand-formed neck of the tank. Here's how we did it:
 |
| boards suspended on a hammock of cast in wires |
 |
| build and adjust the fit of a framework of reinforcing steel |
 |
| line the opening with thick plastic sacking |
 |
| Create the form for the lid's underside contours with a dome of packed sawdust. A band of cardboard forms up the lid's perimeter edge. |
 |
| Line the form with garbage bag plastic, set the reinforcement in place and plaster. |
The final batches of plaster were small ones and more of Eta's young protégés were delighted to take over the mortar mixing.
A few last touches to the roof
and it was time wet things down again, flood the floor with water and wrap the tank up in plastic sheets and tarps so it could benefit from a slow, wet curing process that will ideally be extended for up to a month while other stages of the project continue.
The tools were all cleaned up for a last time and the small crew of stalwarts who were still around that final afternoon sat down for an obligatory photo-op.
It was getting late and we were beyond tired. We packed up our own chakaras for the walk down the hill but the group was still lingering, not seeming to be in any hurry to call it a day. So we stayed a while longer, chatting, admiring the tank from different angles, praising everybody's efforts and really just sharing a few more minutes to savour the culmination of the whole splendid enterprise.


In awe of your ingenuity and generosity.
ReplyDeleteProud of you,bro. Love, A&H
THAT'S AN AWESOME PROJECT FOR WHICH YOU ARE EQUIPPED...Mr. LOUIS GRAM AND
ReplyDeleteTHESE PEOPLE FOR WHOM YOU ARE DOING A GREAT SERVICE...WILL ALWAYS REMEMBER YOU.